
Step-by-Step Guide to Publishing Your Event
Step 1: Log In to Your EventfullSunday Organizer Account
Navigate to the EventfullSunday Organizer Portal.
- First Name and Last Name.
- Email Address.
- Phone Number (with country code).
- Create and confirm a password.
- Select “Organizer” as your role from the dropdown menu.
- Click “Register” to create your account.
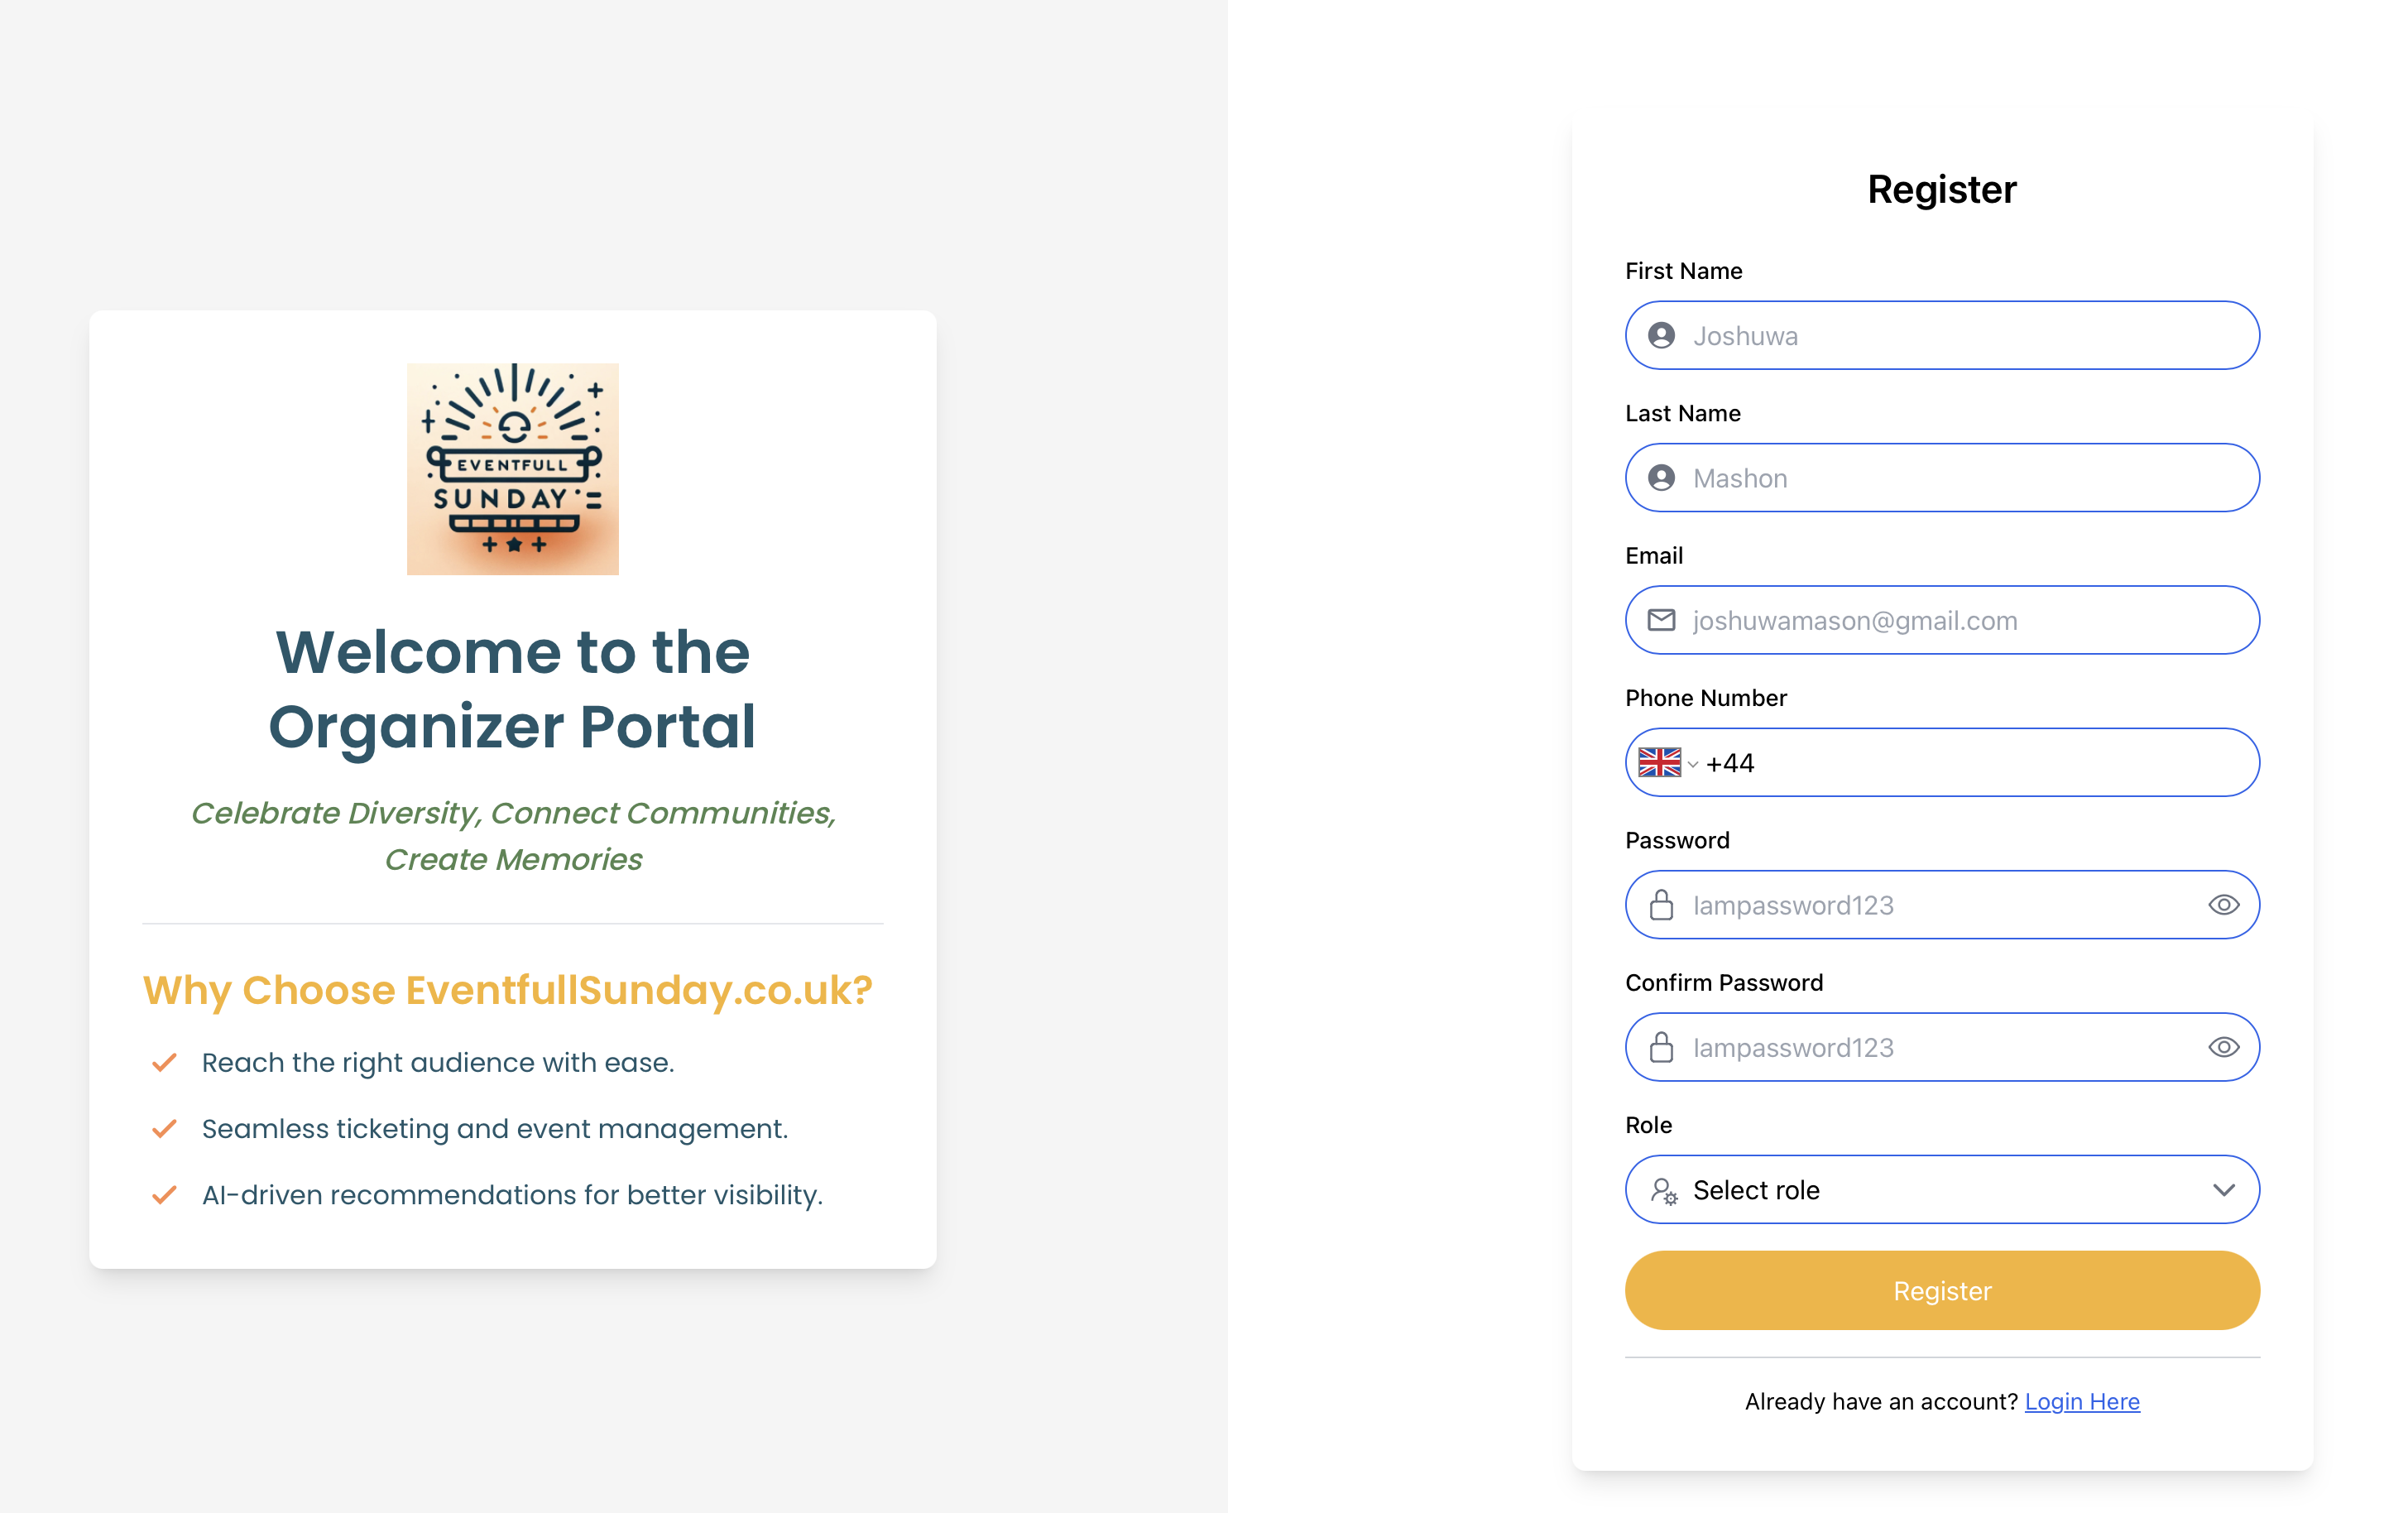
Login to your account after registration using Login
Step 2: Verify Your Email and Profile Details
Email Verification:
- Check your inbox for a verification email from EventfullSunday.
- Click the verification link in the email to confirm your email address.Login to Your Account:
- Once verified, return to the Organizer Portal and log in with your email and password
Profile Verification:
- Navigate to your profile by clicking on your profile icon in the top-right corner.
- If your profile is marked as “Unverified”, follow the prompts to submit any required details or documents.
Step 3: Update Your Organizer Profile
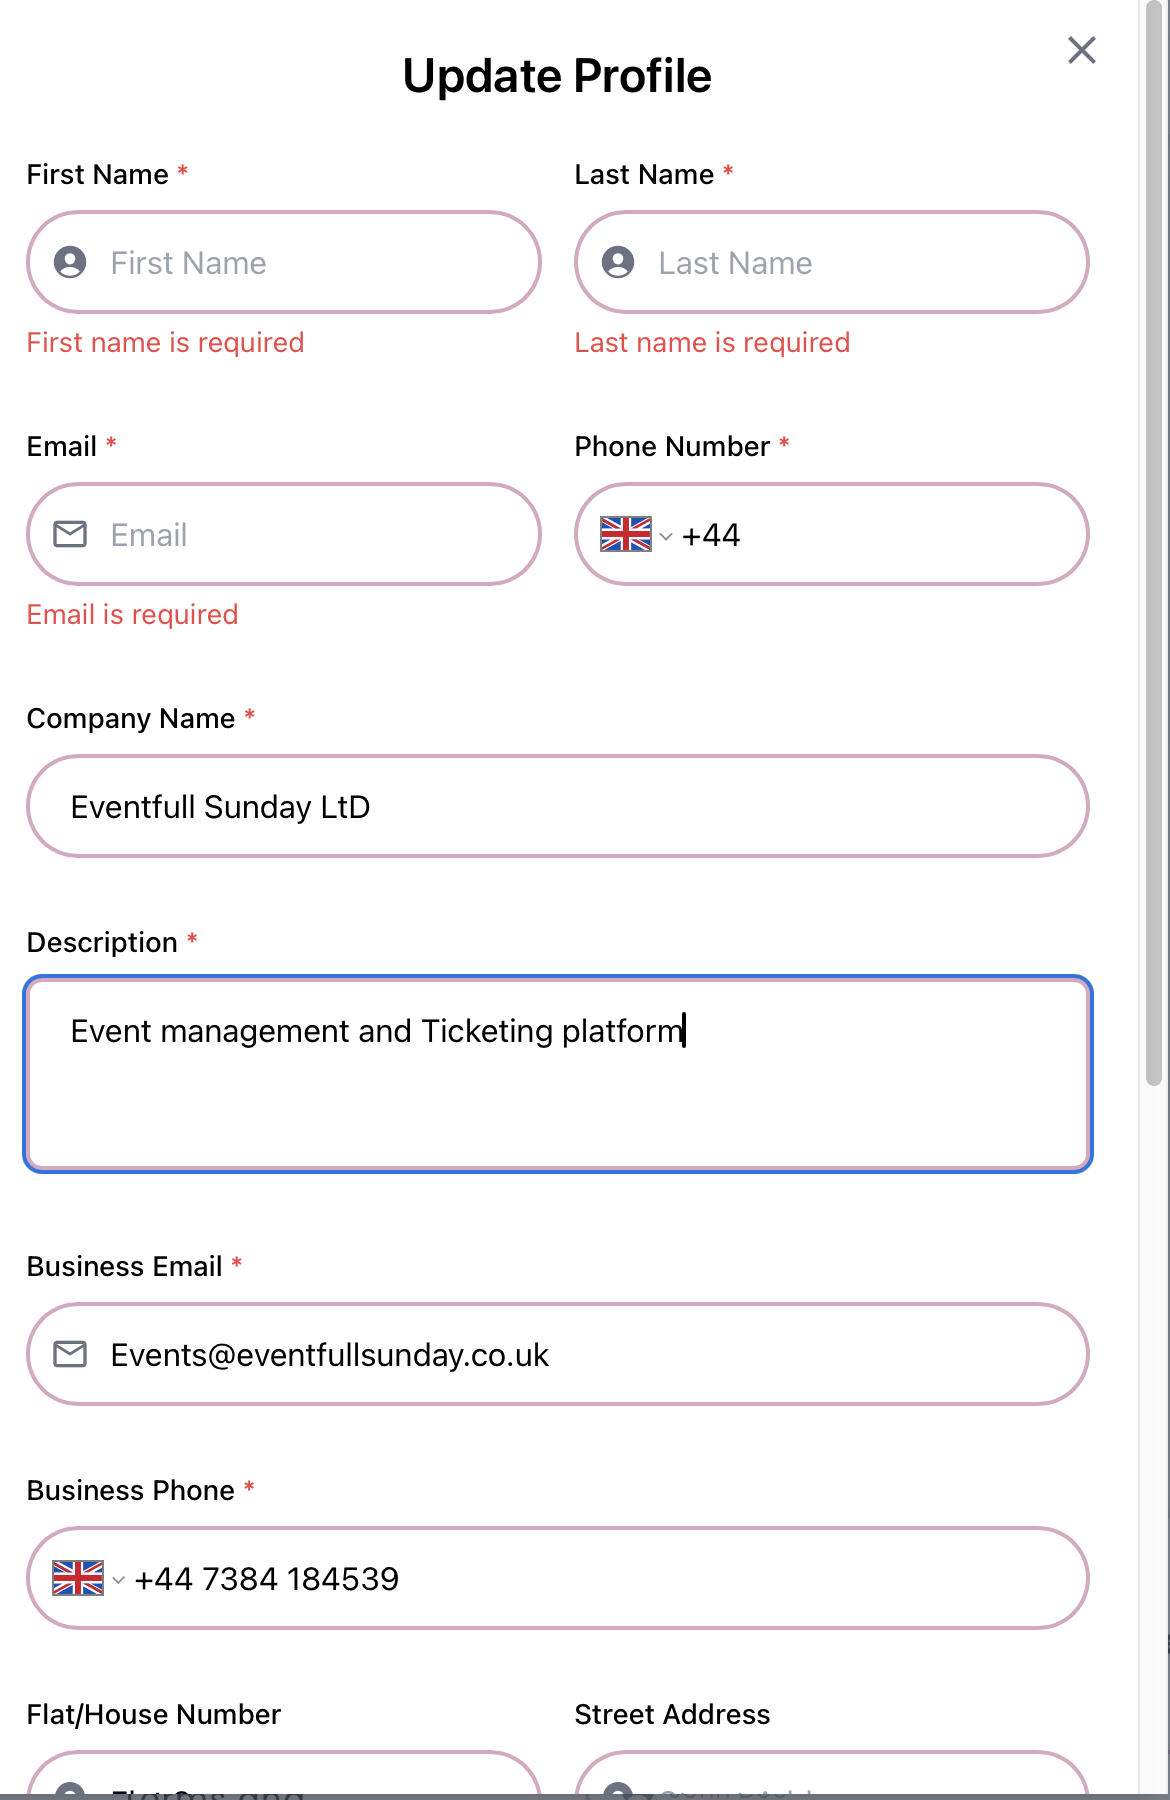
- From your profile page, click “Update Profile” to access the profile update form.
- Complete the following mandatory fields:
- Event Company Name: Enter the official name of your event company or organization.
- Business Email: Provide a valid business email address.
- Phone Number: Ensure your contact number is accurate (e.g., +44 1234 567890).
- Business Address: Enter your flat/house number, street, city, postcode, and country.
- Company Logo: Upload a high-resolution image of your company logo.
- Business Description: Briefly describe your company and its mission.
- Click “Save Updates” to finalize your profile.
- This ensures your organizer account is fully verified and ready to publish events.
Step 4: Create and Publish an Event
Once your profile is updated and verified, follow these steps to create your event:
Step I: Access the Event Creation Form
Navigate to your dashboard and click “Create Event”.
Step II: Fill in Event Details
- Event Name: Add a descriptive title (e.g., “UK Spring Music Festival 2024”).
- Organizer Company: Your company name will be auto-filled from your profile.
- Event Description: Provide a detailed overview of your event. Include keywords like cultural festivals, live music events, UK event promotion.
Step III: Configure Event Parameters
- Event Type: Select Internal (ticket sold thorugh our platform) or External (ticket sold via external third party platform or directly from Event organizer webiste).
- Event Segment: Choose a relevant segment (e.g., Music, Theatre).
- Event Category: Specify the category and subcategory (e.g., Music > Live Performance).
- Event Venue: Search for the venue or manually enter the address.
- Set Dates and Time Input the start and end dates and times.
Step IV: Configure Ticketing
- Ticket Pricing: Set prices or select Free Entry. Use dynamic pricing for optimized revenue.
- Ticket Capacity: Specify the number of tickets available.
- Ticket Categories: Define ticket types (e.g., VIP Access, General Admission).
Step V: Add Media
Upload an event image (max 2MB) that represents the theme or branding of your event.
Step 7: Review and Publish
Preview your event to ensure all details are accurate.
Click “Publish” to make the event live.